Want to find out how easy it is to translate your WordPress plugin into any language? Then read on?
Many WordPress plugins can be translated, including our plugins. They must contain the correct files. Consult the plugin author if you are unsure. The master translation file is a POT file, which can be found in the plugin’s languages folder.
The program we will be using to translate the plugin is?Poedit, which is available for all major operating systems including Windows, OS X, and Linux.
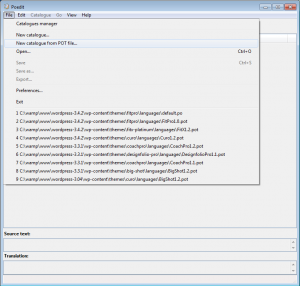
If you haven?t already done so, install Poedit now. Then open it up, and select ?File -> New catalog from POT file?? from the menu.
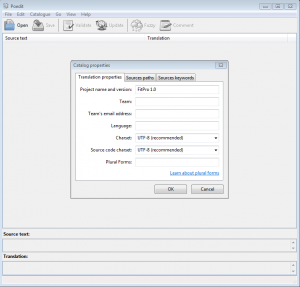
Navigate to your plugin’s languages folder (/wp-content/plugins/) and open the POT file. Next, you will see the ?Catalog properties? dialog box appear. You don?t need to change any of these settings so just go ahead and click OK to close the dialog box.
You will now be prompted to choose the location and file name for your .po translation file, which is used to store all your plugin translations. Make sure you choose to save the .po file in the same directory as the plugin POT file.
The default file name will be something like default .po . This is OK for now but you will need to change this later on to be more specific so WordPress knows which file to use for language translation. More on this later.
For now, just go ahead and click Save to close the ?Save as?? dialog box. You may also notice that a .mo file is saved along with the .po file. Make sure that these two files are kept together.
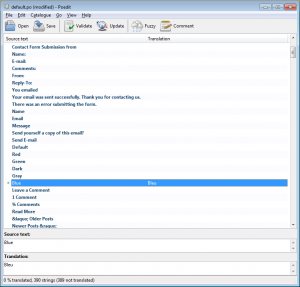
Now for the fun part. You can start to create plugin translations for any phrase used in the plugin into your own language! Simply click on a phrase from the list in the main window to get started.
TIP: In Poedit hit CTRL+F at any time to do a quick search for the phrase you want to translate.
Towards the bottom of the Poedit screen you will see two text boxes. The first one (Source Text) is a read-only box that shows the text of the phrase you just clicked on. The second one (Translation) is where you enter your translations.
As soon as you enter your translated text in the ?Translation? text box you will also see it appear in the main window to the right of the original text. In addition to that, for convenience, every translated phrase in the main window has a star added to the very left to make it easy to spot phrases that have already been translated.
You will need to include the right language and country codes so it can be identified what language is your work made for.
For example, a French localization would have the file names: fr_FR.po and fr_FR.mo.
It is important that .po (and .mo) filenames match the desired locale as specified in wp-config.php (located in your WordPress root directory). The naming convention is language_COUNTRY.po.
Open up your WordPress wp-config.php file and add the WPLANG PHP constant, if one doesn?t already exist, as follows:
define (?WPLANG?, ?en_UK?);
In this example I am using the English UK locale so this would require the .po and .mo files to be named as:
en_UK.po
en_UK.mo
The rule of thumb is that whatever your .po and .mo files are called, the WPLANG constant in wp-config.php should be exactly the same (not including the file extension).
If you want to learn more about how WordPress handles language translation then checkout the following link:


